PhoenixMobile User Manual
◀ SketchTable of ContentsThe Select Tool ▶
Draw Tool
The Draw tool is what you will use to create new exterior walls. To start using it, tap the Draw button on the tool bar.
Contents
- Finger sketching
- Keypad sketching
- Snapping the sketching cursor
- Angled walls
- Bay windows
- Completing an area
- Area type
Finger sketching
Using your finger to sketch is quick and intuitive. To begin sketching, tap the Draw button from the tool bar. You know you're ready to sketch when a floating toolbar appears. figure 1
- Touch and hold your finger where you want to place the point of beginning
- Drag your finger across the screen until the wall is the correct length figure 2
- Lift your finger to complete the wall figure 3
To begin sketching the next wall, touch and hold your finger near where the last wall ended; Phoenix will automatically connect the two ends of the wall when sketching with your finger.
While sketching with your finger is easy, it can be difficult to get things just right. It's best to use your finger for one-off sketching, like connecting two existing walls. For the precise kind of control appraisers need, we recommend using the on-screen keypad to sketch instead.
Keypad sketching
Sketching with the on-screen keypad allows for more precise control than sketching with your finger.
To begin sketching, you will need to display the sketching cursor. If your current floorplan is empty, simply press any of the arrow keys to make the cursor appear. If you have already started a floorplan, use the arrow keys to move the cursor to the desired place to begin sketching. You can move the cursor a specific distance in a direction by typing a number, then pressing the arrow button in that direction.
To draw a new wall:
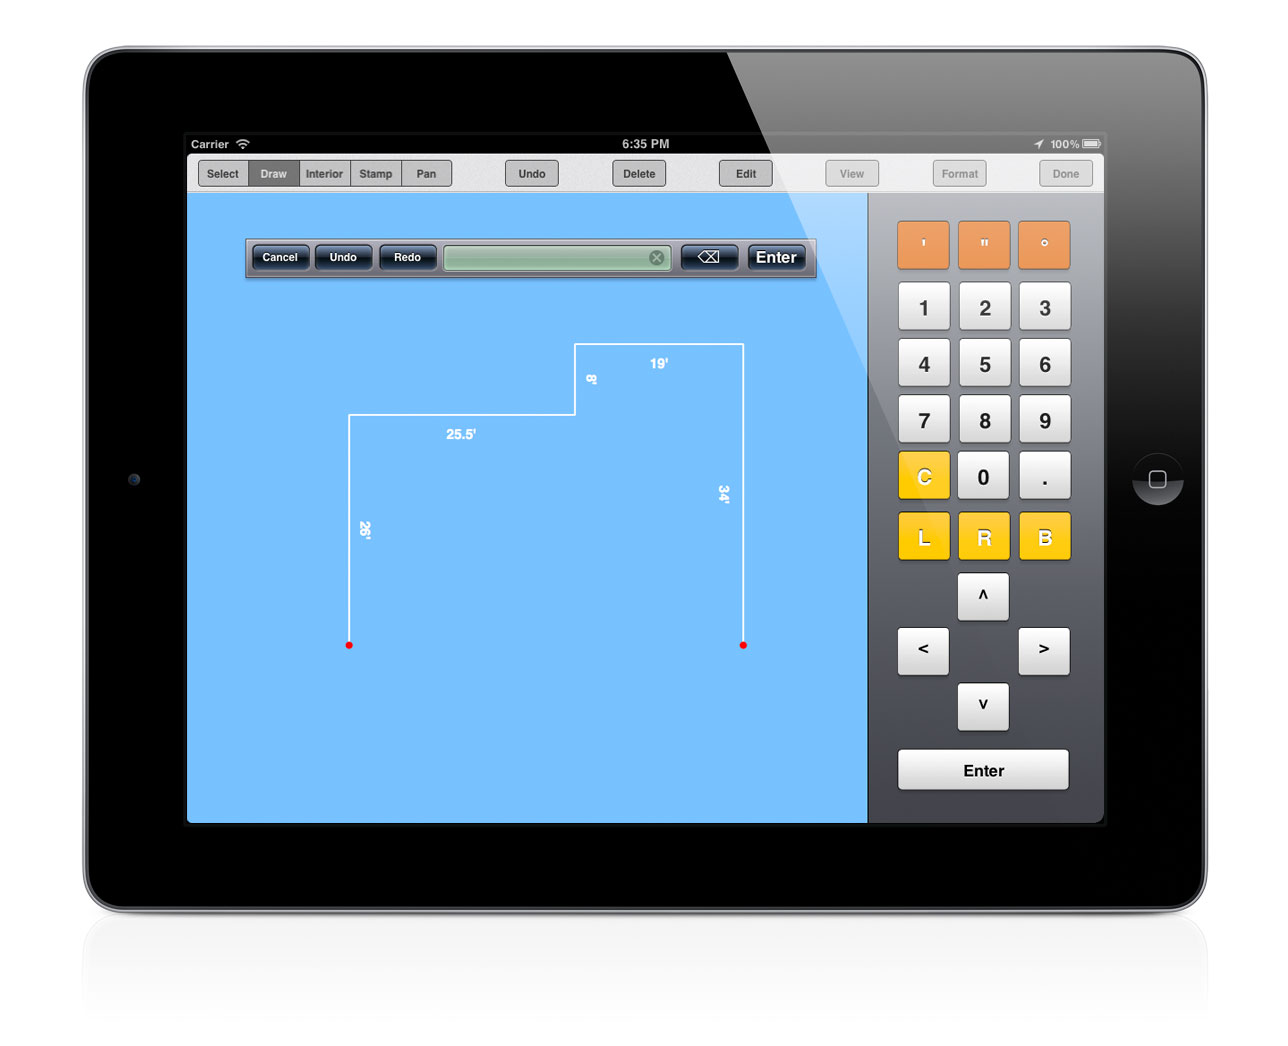
- Position the sketching cursor in the desired location figure 5
- Press Enter to begin sketching
- Type the length of the wall using the number pad
- Press the arrow button in the direction of the wall figure 6
- Press Enter to finalize the wall
To stop sketching, either press Enter again to hide the sketching cursor or just finish the area you're working on.
While the sketching cursor is displayed for keypad sketching, you cannot sketch with the touch screen. Touch the Enter button to return to touch screen sketching.
Snapping the sketching cursor
When drawing with the on-screen keyboard, you can snap the sketching cursor to adjacent corners by simply pressing the directional button in the direction you wish to snap. figure 6
When sketching with your finger, the cursor will automatically snap to adjacent edges as well.
Angled walls
Angled wall surfaces can be sketched using your finger, but is generally easier and more accurate to use the on-screen keypad instead.
Method 1: Rise and run
- Type the distance up (or down) for the wall and tap the directional button; do not press Enter yet
- Type the distance right (or left) for your wall and tap the directional button
- Tap the Enter button
Method 2: Using the angle
- Type the length of the wall
- Tap the L or R button, depending on the direction you wish to angle the wall relative to the last wall sketched
- Type the angle to turn the wall, then tap the ° button
- Tap the Enter button
If the angled wall that you are sketching happens to be a bay window, Phoenix has a handy shortcut to save you some work.
Bay windows
There is a handy shortcut to complete a bay window after you've sketched half of it figure 7. Simply tap the B button (B for Bay Window) and the corresponding side will be completed for you figure 8. If there is more than 3 sides to your bay window, tap the B button until your window is completed.
The bay window shortcut key can only be used when sketching with the keypad. You can tap the Enter button once to change to keypad sketching, press B to complete the bay window, then tap Enter again to return to touch-screen sketching.
Completing an area
When you are almost done sketching an area, you can connect the last wall you sketched back to the point of beginning by tapping the C button (C for Close).
This shortcut can only be used when sketching with the keypad. If you were previously using touch-screen sketching, tap the Enter button to switch to keypad sketching, and tap C to close the area. This will only work if the cursor is on the free end of the last wall you sketched.
Area type
When you close an area and complete it, the Area Type window will automatically appear. The area type is a general description of the area you just completed, such as "First Floor" or "Garage." figure 9
Phoenix comes pre-loaded with most common area types. To use one, simply tap it from the list.
If you can't find an area type that you need, tap the New Area Type button in the lower-right corner. Type in the name for your new area, then tap Done.
Need to change the area type? You can do that using the Select Tool, which we'll discuss next.
◀ SketchTable of ContentsThe Select Tool ▶
 [1] Draw tool selected
 [2] Finger sketching
 [3] Completed Wall
 [4] Sketch in progress
 [5] The sketch cursor
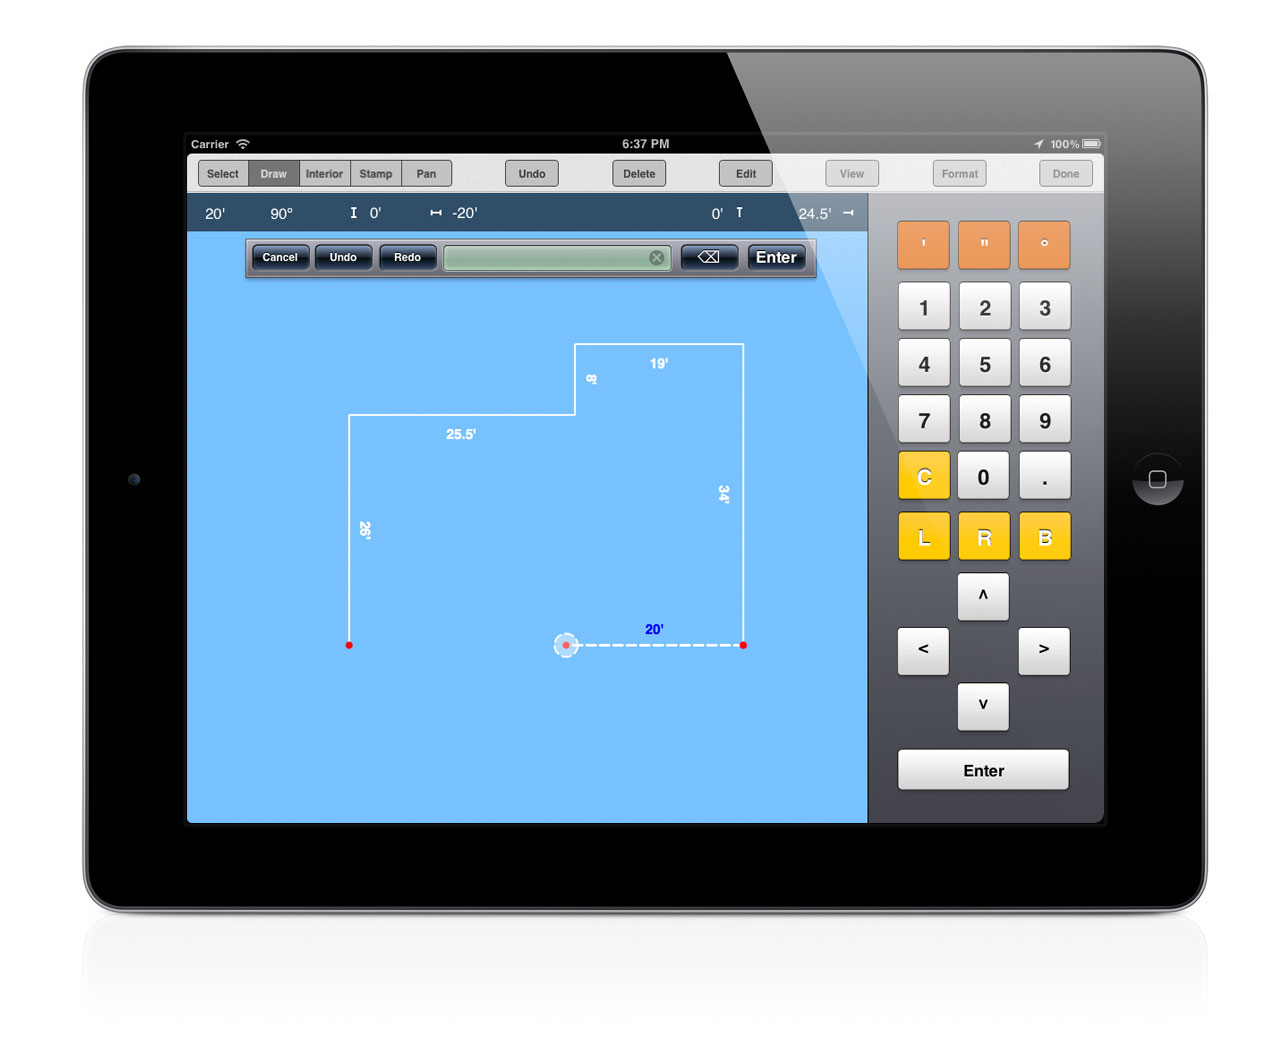 [6] Keyboard snapping
 [7] Partial bay window
 [8] Completed bay window
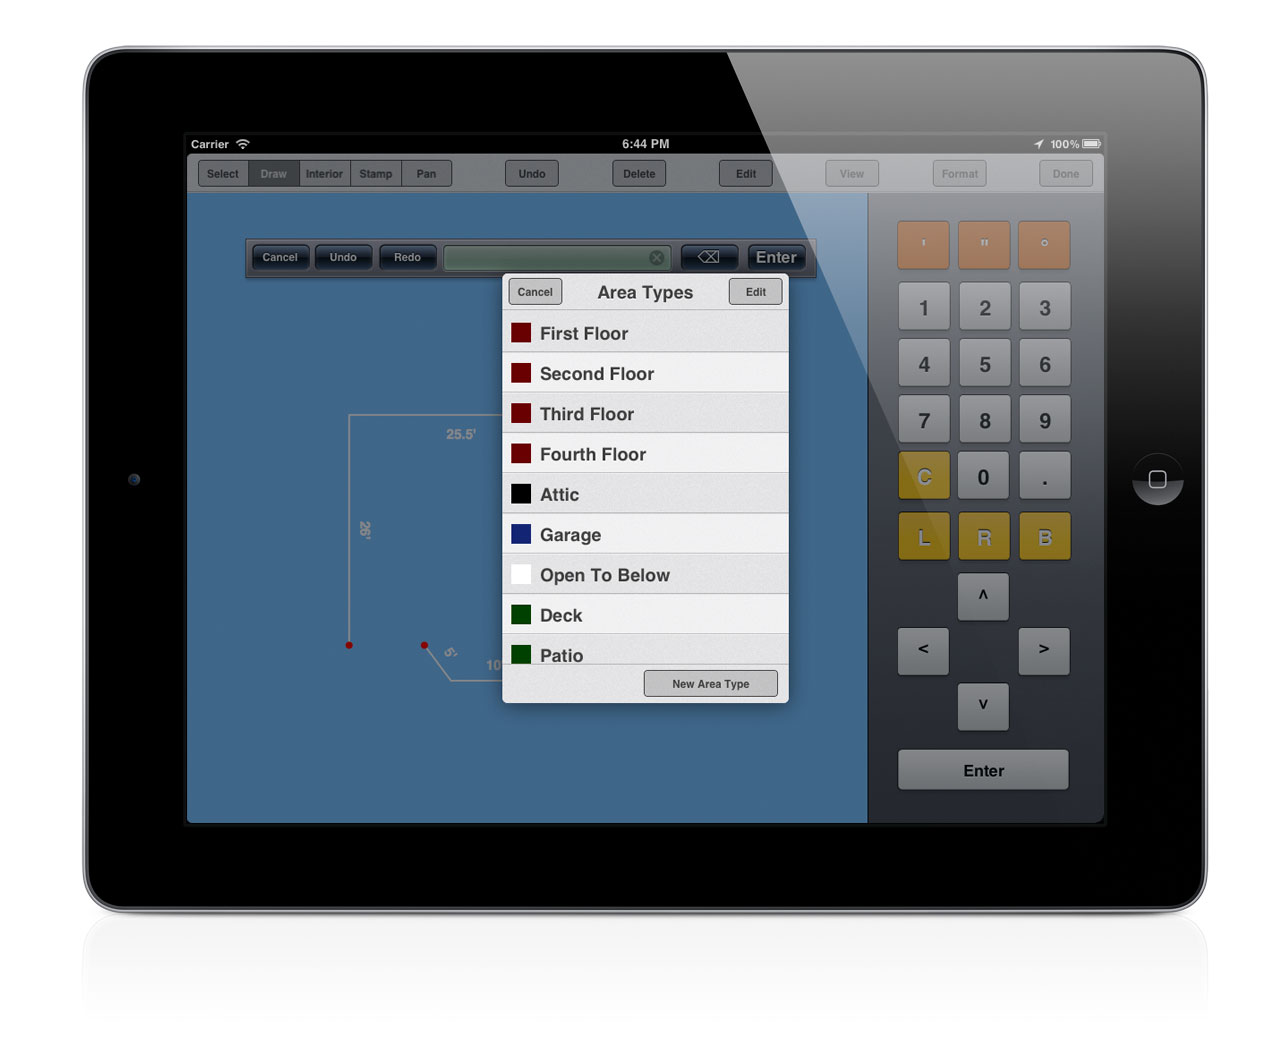 [9] Area type
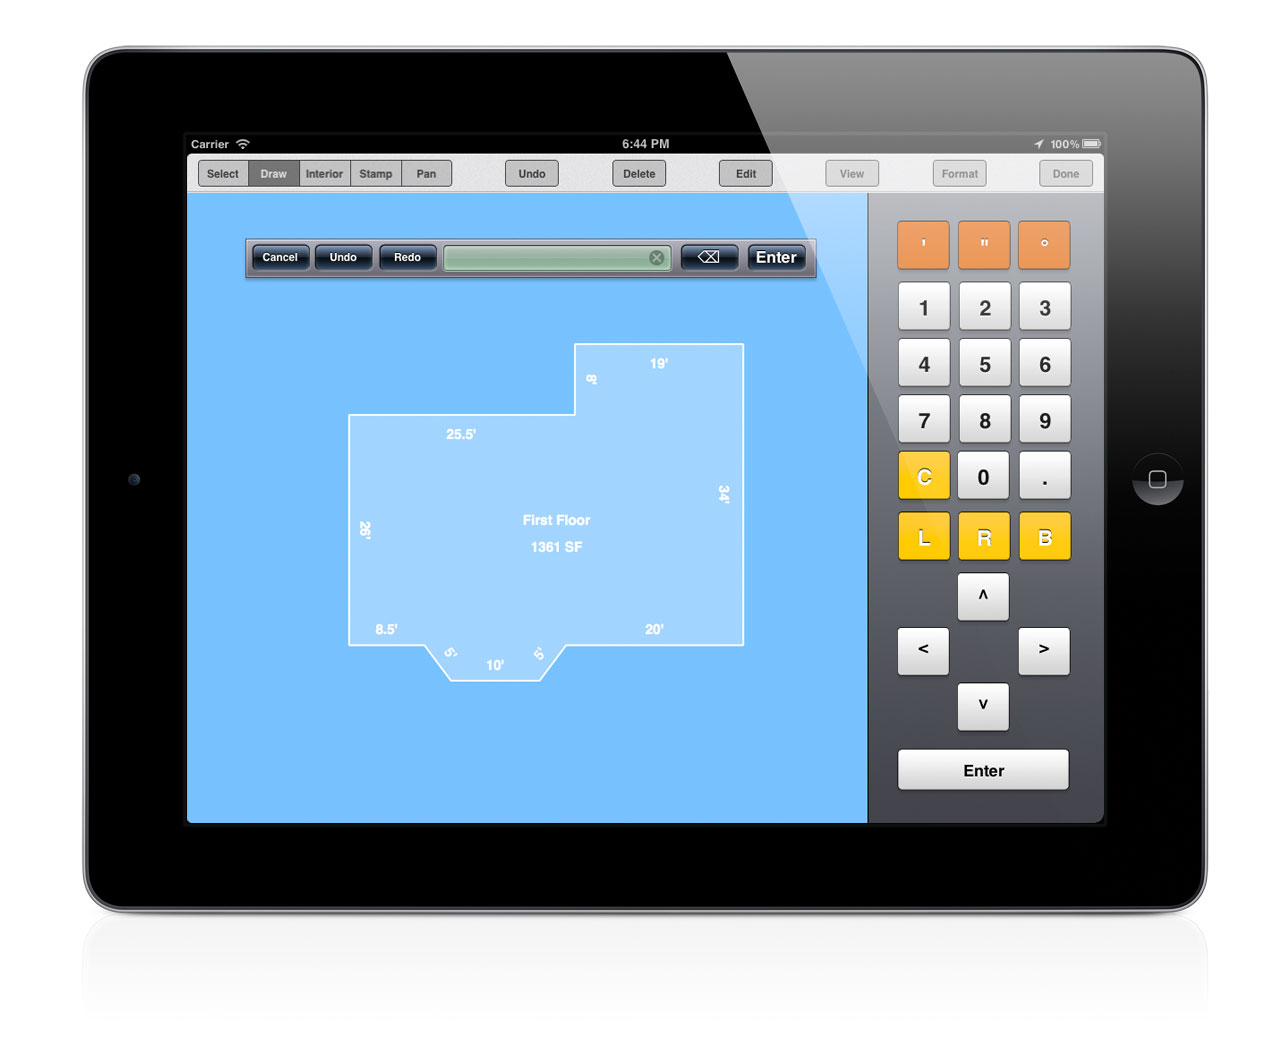 [10] Completed floorplan